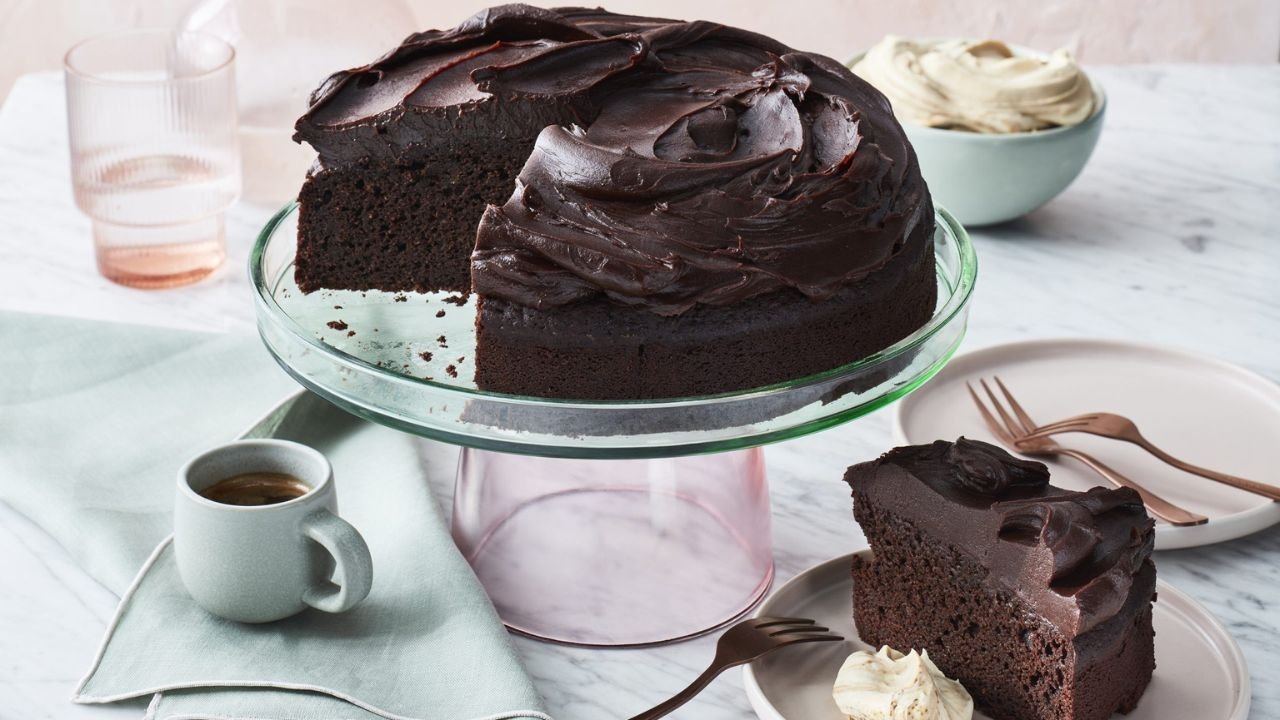
The Most Amazing Chocolate Cake: A Comprehensive Guide
Chocolate cake is a universal favorite, evoking nostalgia, celebration, and pure indulgence. Whether it’s for a birthday, a holiday, or just because, a perfect chocolate cake can elevate any occasion. This recipe, dubbed “The Most Amazing Chocolate Cake,” has earned its reputation through thousands of glowing reviews for its moist crumb, deep chocolate flavor, and straightforward preparation. Below, I’ll walk you through every aspect of creating this masterpiece, from ingredients to serving suggestions, ensuring you can replicate its magic at home.
Recipe Overview
Prep Time: 10 minutes
Cook Time: 30–35 minutes
Total Time: ~45 minutes (plus cooling and frosting time)
Servings: 12–16 (three 9-inch round layers or two thicker 9-inch layers)
Yield: One 9-inch layer cake, one 9×13-inch sheet cake, or ~24 cupcakes
Difficulty: Beginner to intermediate
This is a one-bowl recipe, meaning minimal cleanup and no fancy equipment required. It’s versatile, adaptable for various pan sizes, and pairs beautifully with a range of frostings. The cake’s hallmark is its moist, fudgy texture, achieved through a careful balance of ingredients like buttermilk, oil, and warm water or coffee.
Ingredients
The ingredients are pantry staples, but their quality and proportions are key to the cake’s success. Below, I’ll list each component, explain its role, and offer substitution options.
For the Cake
- 3 cups (360g) all-purpose flour: Provides structure. Use unbleached all-purpose flour for best results. Measure by spooning into a cup and leveling off, or use a kitchen scale for precision.
- 3 cups (600g) granulated sugar: Sweetens and tenderizes the cake, contributing to its moist texture. Do not reduce sugar, as it affects the cake’s structure.
- 1 ½ cups (126g) unsweetened cocoa powder: The star ingredient for chocolate flavor. Hershey’s natural unsweetened cocoa is recommended, but high-quality brands like Ghirardelli or Valrhona elevate the taste. Avoid Dutch-process cocoa unless specified, as it alters the leavening.
- 1 tablespoon baking soda: Reacts with acidic ingredients (buttermilk, cocoa) to create lift and a tender crumb. Ensure it’s fresh for maximum effectiveness.
- 1 ½ teaspoons baking powder: Provides additional lift, especially for the cake’s height in larger pans.
- 1 ½ teaspoons salt: Enhances flavor and balances sweetness. Use table salt or fine sea salt.
- 4 large eggs, room temperature: Bind the batter and add richness. Room-temperature eggs emulsify better, ensuring a smooth batter.
- 1 ½ cups (360ml) buttermilk: Adds moisture, tanginess, and tenderness. Substitute with 1 ½ cups whole milk mixed with 1 ½ tablespoons white vinegar or lemon juice, let sit for 5 minutes.
- 1 ½ cups (360ml) warm water: Thins the batter for a moist, tender crumb. Substitute with brewed coffee (hot or warm, not cold) to deepen the chocolate flavor without a coffee taste.
- ½ cup (120ml) vegetable oil: Ensures a moist cake that stays soft even when chilled. Canola, avocado, or grapeseed oil work well; avoid olive oil due to its strong flavor.
- 2 teaspoons vanilla extract: Enhances chocolate flavor. Use pure vanilla extract for best results.
For the Chocolate Buttercream Frosting
This classic frosting complements the cake’s richness, but you can swap it for ganache, cream cheese frosting, or whipped cream.
- 1 ½ cups (340g) unsalted butter, softened: Creates a creamy base. Use high-quality butter for better flavor.
- 5 cups (625g) powdered sugar, sifted: Sweetens and thickens the frosting. Sifting prevents lumps.
- ¾ cup (63g) unsweetened cocoa powder: Adds chocolate flavor. Hershey’s Special Dark yields a richer, darker frosting.
- ½ cup (120ml) heavy cream: Thins the frosting for spreadability. Substitute with whole milk if needed, but adjust quantity.
- 2 teaspoons vanilla extract: Rounds out the flavor.
- Pinch of salt: Balances sweetness and enhances chocolate notes.
Equipment Needed
- Three 9-inch round cake pans (or two for thicker layers, or one 9×13-inch pan)
- Parchment paper (optional, for easy release)
- Mixing bowls (one large for batter, one for frosting)
- Whisk or hand mixer (stand mixer optional)
- Measuring cups and spoons (or kitchen scale for accuracy)
- Rubber spatula
- Cooling racks
- Offset spatula or butter knife for frosting
- Cake stand or serving plate
Step-by-Step Instructions
Step 1: Prepare Your Workspace
- Preheat the Oven: Set your oven to 350°F (176°C). Position racks in the center for even baking.
- Prepare Pans: Grease pans with butter or nonstick baking spray. Dust with flour or cocoa powder to prevent sticking. For extra assurance, line the bottoms with parchment paper circles, then grease and dust again.
- Gather Ingredients: Measure all ingredients in advance to streamline the process. Ensure eggs and buttermilk are at room temperature for better emulsification.
Step 2: Mix the Batter
- Combine Dry Ingredients: In a large mixing bowl, whisk together flour, sugar, cocoa powder, baking soda, baking powder, and salt until evenly blended. This ensures leavening agents are distributed properly.
- Add Wet Ingredients: Add eggs, buttermilk, warm water (or coffee), vegetable oil, and vanilla extract to the dry mixture. Using a whisk or hand mixer on low speed, blend until smooth, about 1–2 minutes. Scrape the sides and bottom of the bowl with a rubber spatula to incorporate all ingredients.
- Check Batter Consistency: The batter will be thin, almost like pancake batter. This is intentional, as the high liquid content creates the cake’s signature moistness. Avoid overmixing to prevent a dense texture.
Step 3: Bake
- Divide Batter: Pour the batter evenly into the prepared pans (about 3 cups per 9-inch pan). Use a kitchen scale for precision or eyeball it, tapping pans gently to level the batter.
- Bake: Place pans in the oven and bake for 30–35 minutes, or until a toothpick inserted in the center comes out clean or with a few moist crumbs. Rotate pans halfway through if your oven has hot spots.
- Check Doneness: Avoid opening the oven door too early, as this can cause the cakes to sink. Start checking at 30 minutes to prevent overbaking, which can dry out the cake.
Step 4: Cool
- Initial Cooling: Remove pans from the oven and let cakes cool in the pans for 15 minutes. This helps them set and makes removal easier.
- Transfer to Racks: Run a butter knife around the edges to loosen, then invert cakes onto wire racks. Peel off parchment paper if used. Cool completely (about 1–2 hours) before frosting to prevent melting.
Step 5: Make the Frosting
- Beat Butter: In a large bowl, use a hand mixer or stand mixer to beat softened butter until creamy, about 1 minute.
- Add Dry Ingredients: Gradually add sifted powdered sugar, cocoa powder, and a pinch of salt, mixing on low to avoid a sugar cloud. Scrape the bowl as needed.
- Incorporate Liquids: Add vanilla extract and half the heavy cream. Beat on medium-high until fluffy, about 2–3 minutes. Add more cream, 1 tablespoon at a time, until the frosting is spreadable but holds its shape.
- Test Consistency: The frosting should be smooth and spreadable, not runny. If too thick, add more cream; if too thin, add more powdered sugar.
Step 6: Assemble the Cake
- Level Cakes (Optional): If the cakes have domed tops, use a serrated knife or cake leveler to trim them flat for even stacking.
- Frost First Layer: Place one cake layer on a cake stand or plate. Spread about ¾ cup of frosting evenly over the top using an offset spatula.
- Stack and Repeat: Add the second layer, press gently to secure, and spread another ¾ cup of frosting. Top with the third layer.
- Frost Exterior: Apply a thin “crumb coat” of frosting to seal in crumbs. Chill for 15 minutes if desired, then apply a final, thicker layer of frosting to the top and sides. Smooth with a spatula or create swirls for a rustic look.
- Decorate (Optional): Add chocolate curls, sprinkles, fresh berries, or edible flowers for flair.
Step 7: Serve
- Slice the cake with a sharp knife, wiping it clean between cuts for neat slices.
- Serve at room temperature for the best texture and flavor. Pair with vanilla ice cream, whipped cream, or a glass of milk for a classic experience.
The Science Behind the Recipe
Understanding why this recipe works can help you troubleshoot and adapt it. Here’s a breakdown of key ingredients and techniques:
- Cocoa Powder: Natural cocoa powder is acidic, reacting with baking soda to create carbon dioxide bubbles that lift the cake. Dutch-process cocoa, which is neutralized, may result in a denser cake unless adjustments are made.
- Buttermilk: Its acidity tenderizes gluten, making the cake soft, and activates baking soda. The fat content adds richness.
- Oil vs. Butter: Oil remains liquid at room temperature, keeping the cake moist even when refrigerated, unlike butter-based cakes that can firm up.
- Warm Water/Coffee: The high liquid content creates a loose batter, allowing gluten to form gently for a tender crumb. Coffee enhances chocolate’s depth by amplifying its bitter notes.
- Leavening Agents: Baking soda and baking powder work together to ensure the cake rises evenly. Baking soda handles the acidic components, while baking powder provides steady lift.
- Sugar: Beyond sweetness, sugar weakens gluten, retains moisture, and caramelizes during baking for a rich flavor.
Tips for Success
- Measure Accurately: Use a kitchen scale for flour, sugar, and cocoa to avoid packing errors. Too much flour can make the cake dense.
- Don’t Overmix: Mix just until combined to avoid developing too much gluten, which can toughen the cake.
- Check Cocoa Quality: Ensure cocoa powder isn’t expired, as it can lose potency and affect flavor.
- Room-Temperature Ingredients: Cold eggs or buttermilk can cause the batter to curdle or mix unevenly.
- Avoid Overbaking: Check doneness early, as even 2–3 extra minutes can dry out the cake.
- Cool Completely Before Frosting: Warm cakes will melt the frosting, leading to a sloppy appearance.
Variations and Adaptations
This recipe is highly versatile. Here are some ways to customize it:
Pan Sizes
- Two 9-Inch Rounds: For thicker layers, divide batter between two pans and bake for 35–40 minutes.
- 9×13-Inch Sheet Cake: Bake for 35–40 minutes in a greased 9×13-inch pan. Ideal for potlucks or casual gatherings.
- Cupcakes: Fill 24–30 cupcake liners two-thirds full and bake for 18–22 minutes. Perfect for parties.
- Bundt Cake: Use a 10–12-cup Bundt pan, grease generously, and bake for 50–60 minutes.
Frosting Alternatives
- Chocolate Ganache: Heat 1 cup heavy cream, pour over 8 oz chopped dark chocolate, stir until smooth, and pour over the cooled cake.
- Cream Cheese Frosting: Beat 8 oz cream cheese, ½ cup butter, 4 cups powdered sugar, and 1 tsp vanilla for a tangy contrast.
- Whipped Cream: Whip 2 cups heavy cream with ¼ cup powdered sugar and 1 tsp vanilla for a lighter topping.
- Mocha Frosting: Add 1–2 tablespoons espresso powder to the buttercream for a coffee-chocolate twist.
Flavor Twists
- Mexican Chocolate: Add 1 tsp cinnamon and a pinch of cayenne to the batter for a spicy kick.
- Orange Chocolate: Add 1 tbsp orange zest and 1 tsp orange extract to the batter, and pair with orange-infused frosting.
- Mint Chocolate: Add 1 tsp peppermint extract to the frosting and top with crushed peppermint candies.
- Salted Caramel: Drizzle homemade or store-bought caramel sauce between layers and sprinkle with flaky sea salt.
Dietary Adaptations
- Gluten-Free: Substitute all-purpose flour with a 1:1 gluten-free baking blend (like Bob’s Red Mill). Check that cocoa and leavening agents are gluten-free.
- Dairy-Free: Use plant-based milk (soy, almond, or oat) with vinegar for buttermilk, and replace butter in frosting with vegan margarine or coconut oil.
- Egg-Free: Replace each egg with ¼ cup unsweetened applesauce or a flax egg (1 tbsp ground flaxseed + 3 tbsp water, let sit 5 minutes). The texture may be slightly denser.
- Lower Sugar: Reduce sugar to 2 ½ cups, but note the cake may be less moist and tender.
Troubleshooting Common Issues
- Cake Sank in the Middle:
- Cause: Underbaking, too much leavening, or opening the oven door too early.
- Fix: Ensure accurate measurements, bake until a toothpick is clean, and avoid disturbing the cake during the first 20 minutes.
- Cake is Dry:
- Cause: Overbaking, too much flour, or incorrect oven temperature.
- Fix: Check oven with a thermometer, measure flour precisely, and test doneness early.
- Cake Sticks to Pan:
- Cause: Insufficient greasing or no parchment.
- Fix: Grease thoroughly, dust with cocoa, and use parchment liners.
- Frosting is Grainy:
- Cause: Unsifted powdered sugar or insufficient mixing.
- Fix: Sift sugar and beat frosting longer, adding cream gradually.
- Batter Curdled:
- Cause: Cold ingredients or improper mixing.
- Fix: Use room-temperature ingredients and mix wet ingredients thoroughly before combining with dry.
Decoration and Presentation Ideas
A beautifully decorated cake enhances its appeal. Here are creative ideas:
- Classic Elegance: Smooth the frosting and pipe rosettes or borders using a star tip. Add chocolate shavings or curls.
- Rustic Charm: Create swoops and swirls with a spoon for a homestyle look. Sprinkle with powdered sugar or cocoa.
- Festive: Top with seasonal sprinkles, candy canes (for Christmas), or edible glitter for birthdays.
- Fruit Accents: Add fresh raspberries, strawberries, or orange slices for color and flavor.
- Drip Effect: Pour warm ganache over the top, letting it drip down the sides, and top with macarons or meringues.
Storage and Make-Ahead Tips
- Room Temperature: Store the frosted cake under a cake dome for 2–3 days. Ensure it’s in a cool, dry place.
- Refrigerator: Refrigerate for up to 5 days, especially if using perishable frosting (e.g., whipped cream). Wrap loosely in plastic to prevent drying. Bring to room temperature before serving.
- Freezer: Wrap unfrosted cake layers tightly in plastic wrap and foil, then freeze for up to 3 months. Thaw in the fridge overnight before frosting. Frosted cakes can be frozen for 1 month; freeze uncovered for 1 hour to set frosting, then wrap tightly.
- Make-Ahead: Bake cakes a day in advance, wrap well, and refrigerate. Frost the next day. Frosting can be made 2 days ahead and stored in the fridge; rewhip before using.
The History and Cultural Significance of Chocolate Cake
Chocolate cake has a storied history, evolving from early cocoa-based desserts to the modern layer cakes we love today. Cocoa was first used in Europe in the 16th century, but chocolate cakes as we know them emerged in the 19th century with the advent of refined cocoa powder and baking soda. The first recorded chocolate cake recipe appeared in the United States in the 1840s, and by the 20th century, chocolate cake became a staple for celebrations.
This particular recipe, often called the “Matilda Cake” due to its resemblance to the towering chocolate cake in the 1996 film Matilda, captures the indulgent spirit of American baking. Its one-bowl method reflects the post-World War II trend toward convenience, while its rich flavor satisfies the universal craving for chocolate. Today, chocolate cake is a global icon, adapted into countless variations, from German chocolate cake to Mexican chocolate tres leches.
Why This Recipe Stands Out
- Moist and Fudgy: The high liquid content and oil-based batter ensure a tender, never-dry crumb.
- Rich Chocolate Flavor: Quality cocoa and optional coffee create a deep, satisfying taste.
- Ease of Preparation: The one-bowl method is beginner-friendly, requiring no special skills or tools.
- Versatility: Adaptable for any occasion, pan size, or dietary need.
- Crowd-Pleasing: Its universal appeal makes it a go-to for birthdays, holidays, or casual gatherings.
Serving Suggestions
- Classic Pairings: Serve with vanilla ice cream, whipped cream, or a dusting of powdered sugar.
- Beverages: Pair with coffee, hot chocolate, or a glass of red wine (like Cabernet Sauvignon) for adults.
- Dessert Table: Slice into smaller portions and serve alongside other treats like brownies or fruit tarts for a buffet.
- Special Occasions: Customize with themed decorations (e.g., candles for birthdays, holly for Christmas).
Fun Facts About Chocolate Cake
- The world’s largest chocolate cake, made in 2019 in India, weighed over 27,000 pounds!
- Chocolate cake is the most popular cake flavor in the United States, according to a 2023 survey.
- The term “devil’s food cake” refers to a richer, darker chocolate cake, often paired with white frosting for contrast.
- Chocolate contains theobromine, a mild stimulant, which may explain why chocolate cake feels so uplifting.
FAQs
Can I make this cake in advance?
Yes, bake the layers a day ahead, wrap tightly, and refrigerate. Frost within 24 hours for best results. Unfrosted layers can be frozen for up to 3 months.
Why is my cake dense?
Overmixing, too much flour, or expired leavening agents can cause density. Measure carefully, mix minimally, and check baking soda/powder freshness.
Can I use Dutch-process cocoa?
Yes, but the cake may be denser and less risen due to lower acidity. For best results, stick with natural cocoa or adjust leavening (consult a baking resource for exact ratios).
How do I make clean slices?
Use a sharp knife, dip it in hot water, and wipe clean between cuts for neat, professional slices.
Conclusion
The Most Amazing Chocolate Cake lives up to its name with its unbeatable combination of moist texture, intense chocolate flavor, and ease of preparation. Whether you’re a novice baker or a seasoned pro, this recipe delivers a show-stopping dessert that’s perfect for any occasion. With its versatility, you can customize it to suit your tastes, dietary needs, or event theme. Follow the detailed instructions, tips, and variations provided here, and you’ll create a cake that earns rave reviews from family and friends.
Try it for your next celebration, and let me know how it turns out! If you’d like additional recipes (e.g., ganache, vegan frosting) or decorating tutorials, just ask. Happy baking!
Source: Adapted from The Most Amazing Chocolate Cake by thestayathomechef.com, with additional insights from baking science and user reviews.